maniei.ir
یاد من باشد فردا حتما باور این را بکنم، که دگر فرصت نیست و بدانم که اگر دیر کنم ،مهلتی نیست مرا و بدانم که شبی خواهم رفت و شبی هست، که نیست، پس از آن فرداییmaniei.ir
یاد من باشد فردا حتما باور این را بکنم، که دگر فرصت نیست و بدانم که اگر دیر کنم ،مهلتی نیست مرا و بدانم که شبی خواهم رفت و شبی هست، که نیست، پس از آن فرداییدرباره من
 یاد من باشد فردا دم صبح
جور دیگر باشم
بد نگویم به هوا، آب ، زمین
مهربان باشم، با مردم شهر
و فراموش کنم، هر چه گذشت
ادامه...
یاد من باشد فردا دم صبح
جور دیگر باشم
بد نگویم به هوا، آب ، زمین
مهربان باشم، با مردم شهر
و فراموش کنم، هر چه گذشت
ادامه...
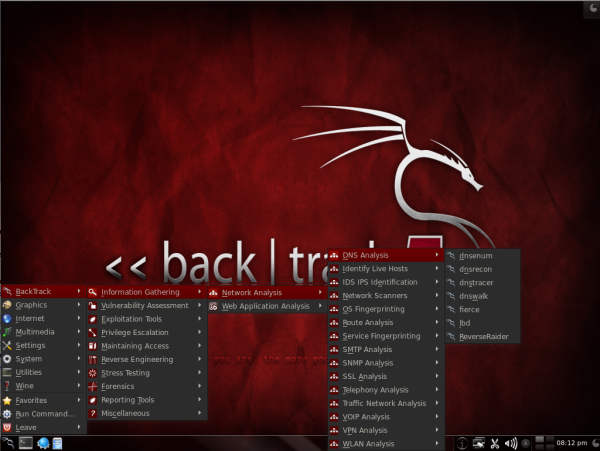
Cisco VPN Network Design

VPN در تکنولوژی سیسکو
در واقع سیسکو این تکنولوژی ارتباطی را که به منظور بر قرار ارتباط امن ما بین دفاتر سازمانها و شبکه ها بود را در دو بخش اعلام و طبقه بندی می کند :
اول ( Enterprise VPN )
دوم ( Service Provider VPN ) .
Enterprise VPN :
- IP Sec
- Cisco Easy VPN
- Generic Routing Encapsulation ( GRE )
- Dynamic Multipoint Virtual Private Network ( DMVPN )
- Virtual Tunnel Interface ( VTI )
- Layer 2 Tunneling Protocol Ver:3 ( L2TPv3 )
Service Provider VPN :
- Multiprotocol Label Switching ( MPLS )
- Metro-Ethernet
- Virtual Private Lan Service ( VPLS )
ادامه مطلب ...
VPLS
استفاده از سرویس VPLS برای ایجاد شبکههای شهری
تاریخچه
شبکههای
خصوصی مجازی (VPN) در اوایل دهه 1980 به دنیای شبکه معرفی شدند. در آن
زمان این شبکهها با استفاده از خطوط استیجاری (Leased Line) ایجاد
میشدند. در سال 1990 با توجه به تحولات در عرصه فناوری و پیدایش فناوری
Frame Relay، ساختار شبکههای مجازی نیز تغییر کرد. در اواخر دهه 90 یعنی
زمانی که MPLS به دنیای شبکه پا نهاد، انواع جدیدی از VPNها معرفی شدند. در
آن زمان این شبکهها به طور کلی به سه گروه تقسیم میشدند:
دسته یکم: VPNهای لایه سه که عموماً بر بستر IP پیادهسازی میشدند و به Virtual Private Routed Network موسوم بودند.
دسته دوم: VPNهای لایه دو که به طور عمومی به صورت P2P تعریف میشدند و به Virtual Leased Line) VLL)معروف بودند.
دسته سوم: VPNهای لایه دویی که به صورت P2MP پیکربندی میشدند. این VPNها برخلاف IP-VPNها ترافیک غیر IP را نیز منتقل مینمودند.
سرویس VPLS چیست؟
سرویس
VPLS که به Transparent LAN Service) TLS) نیز معروف است، در حقیقت یک
سرویس اترنت P2MP است که میتواند یک یا چند ناحیه شهری را پوششدهد و
اتصال بین چندین سایت را که به یک LAN اترنت متصلند فراهم نماید. برخلاف
سرویس اترنت، P2MP که در حال حاضر روی بستری ارائه میشود که ترکیبی از
سوییچهای اترنت است، VPLS از زیرساخت IP-MPLS برای ارائه سرویس استفاده
مینماید. به طور کلی میتوان تصور کرد تمام کاربران یک شبکه VPLS بدون
توجه به مکان فیزیکی، به صورت مجازی در یک LAN قرار دارند که برای هر
سازمان میتوان یک یا چند دامنه VPLS domain) VPLS) را همچون VLAN بهکار
برد.
امروزه سرویس اترنت شهری که فراهمکنندگان سرویس در نواحی
مختلف آنرا ارائه میکنند و اغلب اتصالات نقطهبهنقطه بین چندین سایت، در
همان شبکه شهری است. به هر حال هدف نهایی اترنت شهری، گذر از اتصال نقطه
به نقطه در محدوده ناحیه شهری به ارائه اتصال چند نقطه به چندنقطه در
داخل یک ناحیه شهری و یا چندین ناحیه شهری است. به عبارت دیگر، ارائه سرویس
به سازمان به گونهای انجام شود که تمام سایتهای آن در صورت اتصال به
LAN به صورت یکسان ظاهر شوند؛ صرفنظر از اینکه آیا این سایتها در یک
ناحیه شهری هستند یا در چندین ناحیه شهری گسترده شدهاند. پس یکی از
مطرحترین روشها برای تحقیق این تصور، سرویسLAN خصوصی مجازی (VPLS) است
که اتصال اترنت چندنقطه به چندنقطه را هم در داخل و هم بین شبکههای شهری
تحت شبکه فراهمکننده سرویس IP/MPLS قابل توسعه فراهممینماید.
استاندارد VPN در لایه دو
با
توجه به ماهیت VPLS، این سرویس به سرعت در میان ارائهدهندگان سرویس
فراگیر شد. زیرا با صرف هزینه بسیار کم قادر بودند سرویسهای مبتنی بر FR و
ATM خود را جایگزین نمایند. به این ترتیب با جهتگیری ارائهدهندگان سرویس
به سمت ارائه این سرویس، لازم بود VPLSها به صورت استاندارد ارائه شوند. به
این منظورIETF اقدام به تدوین استانداردی در زمینه ارائه این سرویس نمود.
همانگونه که در شکل یک نشان داده شده است قسمتهای مختلفی در تدوین
استاندارد VPLS حضور دارند و هر یک مسئول استانداردسازی بخشی از این سرویس
میباشند.
|
|
|
شکل 1 |

گروه PWE3 روی رسانه انتقال VPLS، استانداردهای مربوطه را تدوین مینماید. این استاندارد سرویسهایی نظیرATM ،Frame Relay، اترنت و TDM را روی بستر MPLS پیادهسازی مینماید. در گذشته برای برقراری ارتباط میانVLANها و شبکههای L3VPN از استانداردی با عنوان Draft Martini استفادهمیشد. این استاندارد، شبکههای مجازی لایه دو را روی شبکههای مجازی لایه سه Map مینمود. در حال حاضر با استفاده از استاندارد VPL میتوان کلیه شبکهها را در لایههای مختلف به یکدیگر مرتبط نمود.
ادامه مطلب ...
MPLS and VPLS
MPLS vs VPLS
MPLS
MPLS (Multi-Protocol Label Switching) is a Packet forwarding technique commonly used these days. The name itself indicates that this is a switching technique. To explain this, we will take a real world example; think about a postal system internal to a country, Postal Code is introduced to make the sorting easy. It is a kind of a routing mechanism from one part of the country to another part .Postal code is used as label to switch the letters in the postal backbone across the country. Once the letters collected in local postal exchange they sort them by postal code and put it in a bag labelled with destination postal code. This is easy rather sorting the letters by looking at their destination addresses. So these bags will be sent to nearest postal exchange of the destination postal code. At that office they remove the bag and sort the letters by destination addresses.
Similar Scenario in IP Networks, consider a national IP backbone of a country, When a IP packet reaches the entry router of the backbone network, for switching efficiency (mainly) we label them with label exactly like postal code scenario. Entry router is called as Ingress router in MPLS terminology which applies label on top of each packet. Relevant and important parameters of IP headers will be mapped to label headers. Then these packets will be switched in the backbone network via LSP (Label Switched Path) decided by the core routers. So Core MPLS routers will do mainly the switching function with lots of techniques to ensure Quality of Service and Traffic Engineering aspects. Routers in between, referred as transit routers perform label swapping function as they switch labelled packets from port to port. The backbone destination router where the packet supposed to leave from core network is referred as Egress Router, which removes the label and sends as IP headed packet. Hereafter IP routing will take care of the packet delivery to designated IP address
VPLS
VPLS (Virtual Private LAN Service) is one of the services from a bunch of services offered over a managed MPLS network. VPLS is an Ethernet based point to multipoint layer 2 VPN service that allows to connect dispersed Ethernet LAN in a corporate network.
Since Ethernet is preferred LAN technology, to extend this LAN services to geographically dispersed customer locations located anywhere, the VPLS is introduced. VPLS provides Ethernet interface to users over the boundaries of LAN and WAN for customer and service provider. All services in VPLS is same as LAN services.
Summary
MPLS is a switching protocol considered to lie in between Layer 2 and Layer 3 in OSI Model.
MPLS is a technology for switching and VPLS is one of the services which run on MPLS.
MPLS supports Quality of Service in the Core network with Traffic Engineering.
VPLS is a virtual LAN services run on Manage IP/MPLS services inspite of geographical location
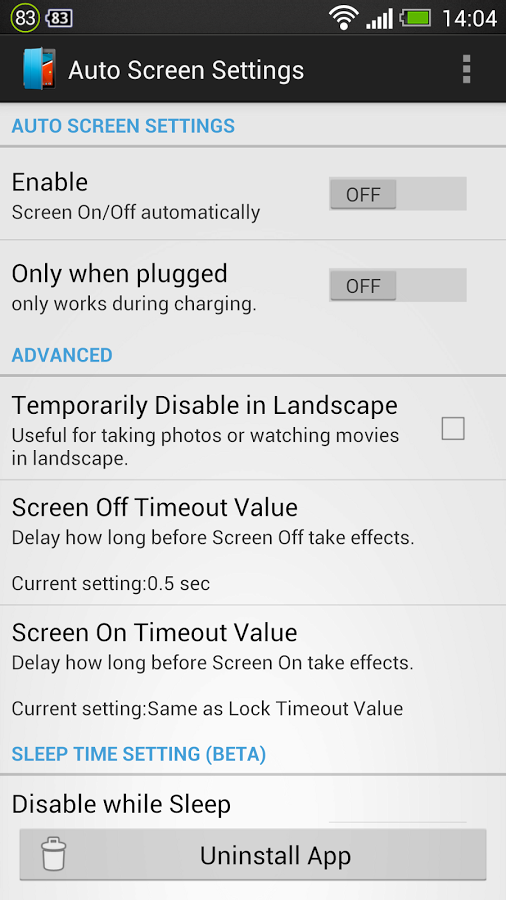
Air wake up
صفحه نمایش گوشی خود را بدون تماس دست روشن کنید!
اگر جزو کاربرانی هستید که یک دقیقه هم نمیتوانند دستگاه هوشمندشان را از خودشان دور کنند، باید خیلی مراقب باشید؛ زیرا فشار مداوم کلیدهای پاور و خانه میتواند از عمر آنها بکاهد و موجب خرابی زودهنگام این کلیدها شود. دوست دارید بدون زدن هیچیک از کلیدهای تلفن همراه یا تبلت خود، آن را روشن کنید؟ (خروج از حالت آماده به کار)
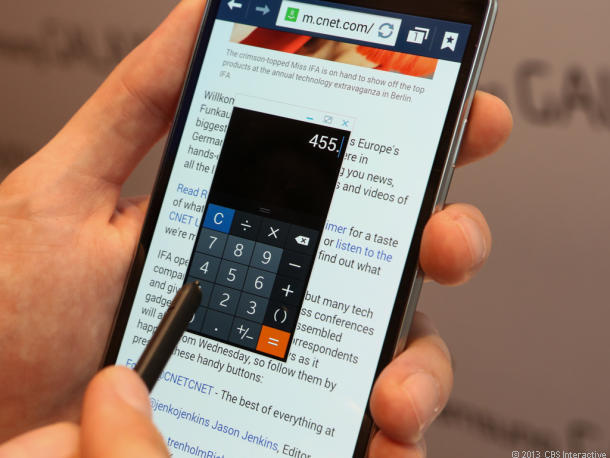
برای استفاده از این قابلیت در گلکسی اس 5 میتوانید به این روش عمل کنید:
1ـ فهرست برنامهها را باز کرده و روی Settings فشار دهید.
2ـ صفحه تنظیمات را به پایین اسکرل کنید تا به بخش Personalization دسترسی یابید. اکنون در این بخش روی Accessibility فشار دهید.
3ـ در صفحه بهنمایش درآمده روی Dexterity and interaction فشار دهید.
4ـ در صفحه جدید، گزینهای با عنوان Air wake up دیده میشود. روی آن فشار داده و در صفحه مربوط به آن با حرکت دادن کلید موجود به سمت راست، وضعیت آن را به On تغییر دهید. (رنگ سبز نشاندهنده فعال شدن این قابلیت است).
5ـ اکنون شما میتوانید بدون لمس کردن دستگاه خود با قرار دادن کف دست در بالای صفحه تلفن همراه، (بالای حسگر نزدیک اسپیکر دستگاه) آن را روشن کنید. برای آزمایش این قابلیت میتوانید بهطور دستی صفحه نمایش را خاموش کنید و این قابلیت را اجرا کنید. (طبق مشاهدات صورت گرفته، چنانچه تلفن همراه شما روی سطح ثابتی قرار گرفته باشد، نتیجه این عملکرد بهتر خواهد بود).
دیگر دستگاههای اندرویدی
توجه: استفاده از قابلیت Air wake up یا نرمافزار فوق، مصرف شارژ باتری دستگاه را افزایش میدهد.
Windows 7 bootloader
To restore the Windows Vista/7 bootloader, you must first boot off your Windows Vista/7 installation DVD.
If you have one of the many OEM computers that didnt come with a Vista/7 installation disk, you can get the same effect with a Vista recovery disk, which you can download for Vista or Win 7.
When you get to the Regional settings, select your Location/Keyboard setting then click next. On the next page you must click on "Repair your computer."
On the next page, if it finds your Windows Vista/7 installation, make sure it is UNSELECTED before clicking next.
Then click on "Command prompt". From there, type in the folowing:
bootrec.exe /fixboot
bootrec.exe /fixmbr
Take out your Vista/7 DVD and hopefully, you will be left with your Windows Vista/7 Bootloader.
Windows XP bootloader
For this you will need your Windows XP installation CD. Boot into it now.
You will get to a part where it asks if you want to repair or recover. To do so, press "r".
If prompted, enter your Windows XP administrator password. This will leave you at at a command line, so type in the following two commands:
fixboot
fixmbr
exit
Ubuntu grub bootloader
First you need to find out what your drives are called. You can do this by going to a terminal and typing:
sudo fdisk -l
So, still in the terminal, type:
sudo mkdir /media/sda5
sudo mount /dev/sda5 /media/sda5
sudo grub-install --root-directory=/media/sda5 /dev/sda